Over the past couple months we have slowly converted our garage into a functional home gym.
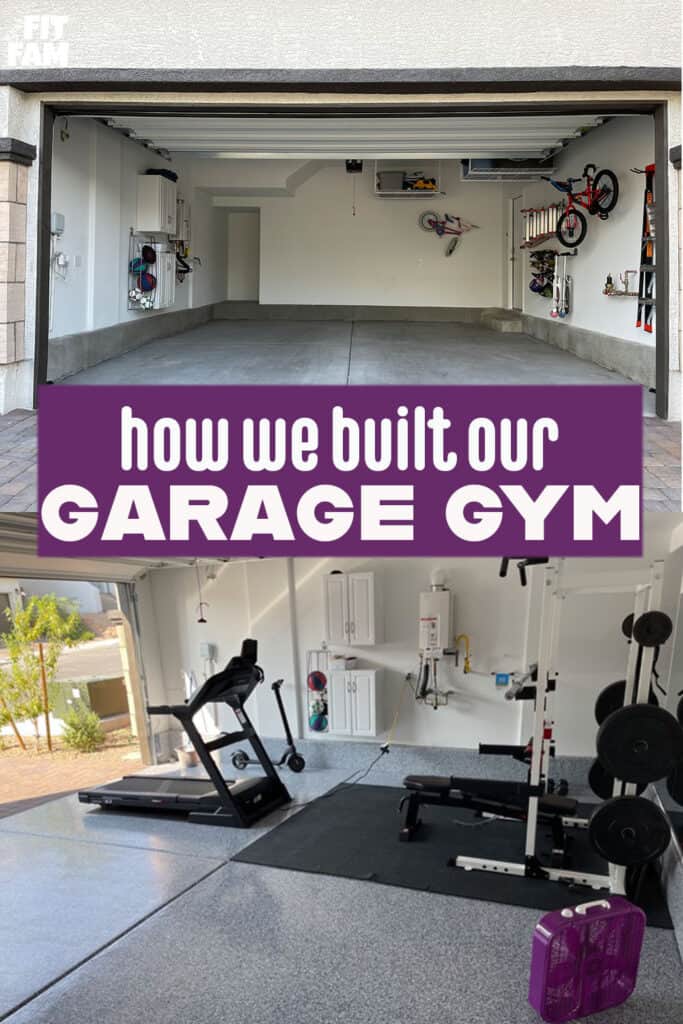
While I do love the atmosphere at an actual gym, having all the necessary equipment at home is so convenient. So let’s go over how we did it.
Garage gym steps:
Step 1: Declutter
The first step is to declutter. So many people use their garage as a storage unit. Space is key.
We installed 2 overhead storage racks, 2 cabinets (stacked) from HomeDepot, and hung everything we could on the walls using hooks like these.
Other helpful organizational items we used: Rubbermaid vertical ball rack, this skateboard rack, and small plastic bins for inside the garage cabinets.
Step 2: Floors
Once everything is organized and off the ground, it’s time to tackle floors. We chose to epoxy our floors.
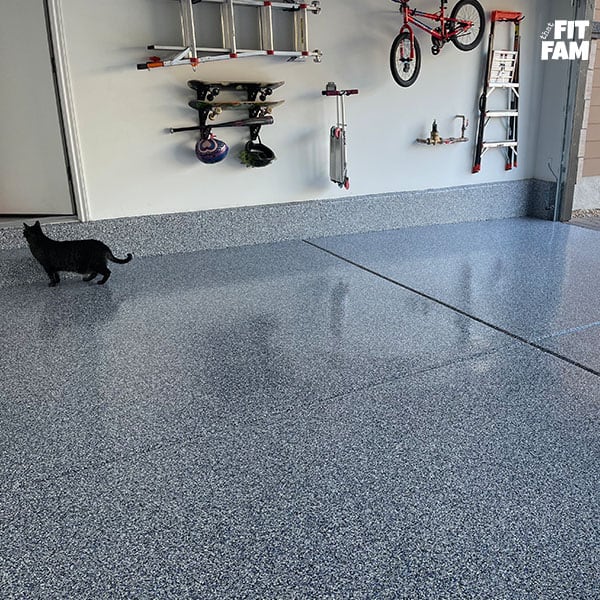
We did NOT do this ourselves. We know nothing about epoxy. People on various blogs say it’s easy to DIY, but how is the quality? Will it last or will it peel up? We decided it was best to trust the pros. They epoxied our floor and grinded it down first to ensure it will last. If you’re local, we used a company called Rax Masters.
After the epoxy, we set up floor tiles from Home Depot. We bought 6 boxes of TrafficMaster tiles for under our squat rack. These have a .3 inch thickness and perfectly covered 1/4 of our 2 car garage.
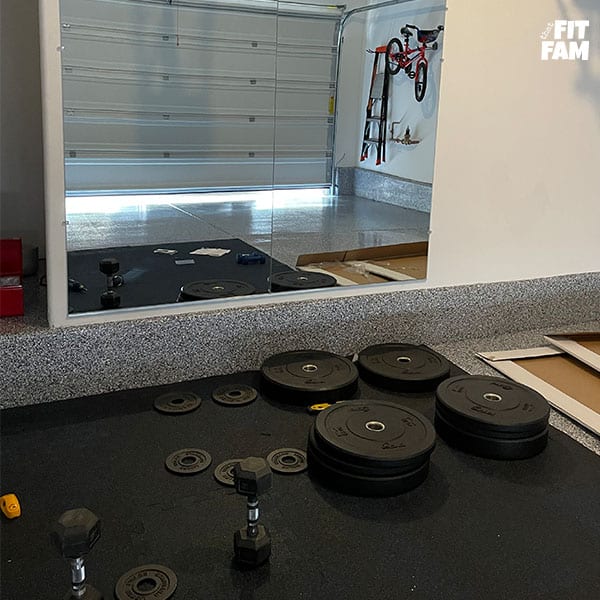
Step 3: Mirrors.
Mirrors are so important to ensure your form is good during your workout. We bought two 36″ x 60″ frameless mirrors from Home Depot and mounted them with the included brackets AND this 72″ J-mold on bottom. This was so much easier to install than we expected. We may buy another mirror down the road if we buy more dumbbells.
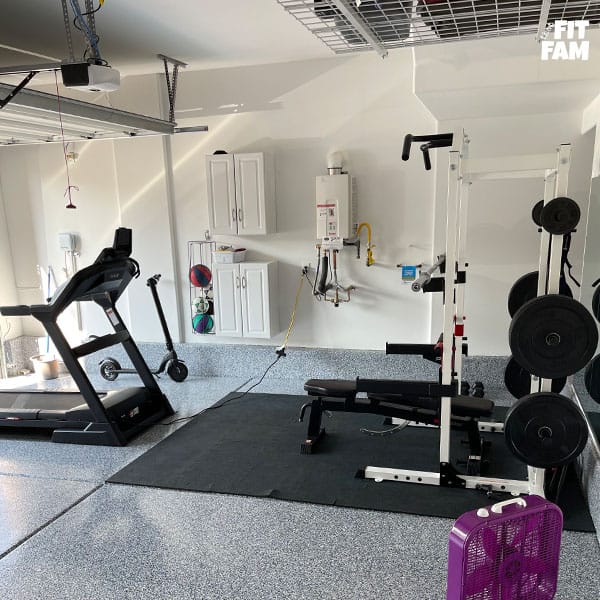
Step 4: Gym Equipment
This is the funnest step. It can be hard to find gym gear for a decent price right now, especially with a lot of items out of stock. Let me show you what we got.
Squat rack. The big selling point for us was that it included plate storage and a ton of attachments, like dip bars and pull up bars.
The specific squat rack is no longer on Target, but here it is from Amazon: Body Power Deluxe Rack Cage in White.
Unfortunately, the dimensions online did not show the measurements of the inside of the cage.
This is more of a half rack, so the included safety rods are almost useless because it is impossible to squat inside the rack or bench press without hitting your plates that are stored on the back rods. You can remove the stored plates, but your bar path would still need to be so precise to avoid hitting the storage rods.
We ended up buying spotter arms from PRX performance to make it more functional. These are meant for a 3×3 tubing. The squat rack we have is a very unique 3×2 tubing, so we purchased a 1 inch adapter on Etsy to fill in the gap.
Barbell. This is the barbell we have. Titan fitness offers free shipping which is awesome since a barbell weighs 45 lbs.
Crumb Rubber Bumper Plates. We chose crumb rubber bumper (from PRX) because they are more durable, and most importantly, were completely in stock (the price was decent too). We did the 160 lb package and then added on a pair of 15s. I’m sure we’ll get more down the road, but this is good for now.
Change Plates. (4) 2.5 & (2) 5 lb pound plates (from PRX) were a priority request from Scott. They are so great for increasing weight incrementally and hitting PRs.
Adjustable Bench. These are pretty easy to find. We got ours from Costco online because Costco has an amazing return policy. It is good quality and we haven’t needed to return it. Make sure you grab an adjustable bench, they are way more versatile.
Dumbbells. We already had 15s and 5s. Eventually we want to buy more, but it is not a huge priority.
Bands. I have some fabric long bands and booty bands that I bought from Amazon a while ago. The long bands are great for makeshift lat pull downs or lying leg curls.
Treadmill. We purchased the Sole F63 treadmill from Sole Fitness. There are cheaper treadmills. We picked this one because incline, speed and weight capacity were important to us. This model goes up to a level 15 incline and 12 mph speed, plus a 325 lb weight capacity and a lifetime warranty on frame and motor. Also, it had free shipping which was a nice bonus.

Single Leg Squat Stand. This is one of our newest additions and it is perfect for bulgarian split squats. We ordered this one from Titan Fitness, but they had it in white.
Fans. Not a workout item, but so key in a garage gym/ no AC workout space. We may mount permanent fans down the road, but for now we just have regular ones from Walmart. Also, I recently purchased this small usb stroller fan with a flexible tripod so that I could wrap it around the treadmill or squat rack bars for a more targeted breeze.
Lighting. If you plan on working out in your garage with the doors closed, chances are you will need better lighting. We purchased this garage light from amazon and we love it! It’s extremely bright, inexpensive and screws directly into the socket like a regular light bulb. This link doesn’t take you do the same light anymore. I can’t find it, but it is the same company. Maybe they will bring it back soon.
Equipment we plan on getting:
We still want to add in some rolling mats for the kids to practice jiu-jitsu at home, as well as a stand for a heavy kids punching bag that we own.
Another fun item might be a beverage fridge stocked with waters and gatorades, etc.
Hopefully we will have these items by the end of the year and I can update this post, but for now, this is the perfect home gym.